Salesforce CI Using Bitbucket Pipelines (1/x)
Atlassian is sunsetting their hosted Bamboo service soon, so a work collegue and I have been taking their new Bitbucket Pipelines feature for a test drive. The hope is that it will (mostly) fill the void Bamboo will leave in our SDLC.
It has taken us a couple days to get back to where we were with Bamboo, in part because there aren’t many examples on the web describing what a simple, code-to-org solution might look like.
And so I’ll describe a very simple scenario here, and I plan to follow up later with a slightly more involved one.
Things You’ll Need
- Bitbucket Account and Git repository 1
- Force.com Migration Tool 2
- A simple project (or the sample described below) 3
- A new Developer Edition Org 4
The Important Pieces… A Quick Overview
bitbucket-pipelines.yml - This YAML file describes your repo’s Pipelines jobs at the highest level. Pipelines will look for it in the root of your git repo whenever a commit happens. It allows you to define a default job, different behaviors for your branches by name (or by matching), and even which environments to use when doing the job. 5
ant-salesforce.jar and build.xml - These come in a zip file from Salesforce 2. The jar file is a plugin used by Ant, helping it to do what we want with your Org. The build.xml is where we’ll actually describe that behavior.
package.xml - This is a manifest of your project’s Salesforce-specific, constituent pieces. If you’ve written an Apex Class, Visualforce Page, Object, Field, or any of the other Metadata types you’re familiar with, its name gets listed in here.
Pipelines Environment Settings - These are key value pairs entered in your Bitbucket Account. You’ll find them in under your settings, beneath Pipelines. Each key provided here will be exposed as an environment variable in your build job.
Let’s start putting it together…
Our Environment Variables
-
Create an entry with the key name “SF_USERNAME” and set its value to your Developer Org username.
-
Create another entry with the key name “SF_PASSWORD” and set its value to your password and security token. This is important, as otherwise your job will fail to authenticate. You cannot reliably whitelist an IP range here, so use the token. You’ll also want to go ahead and mark this one as a secured value so it isn’t revealed to observers. Note that this isn’t a reliable way to keep your credentials secret… it’s just for regular UI purposes.
Our build.xml File
<project name="Sample usage of Salesforce Ant tasks" default="test" basedir="." xmlns:sf="antlib:com.salesforce">

    <!-- <property file="build.properties"/> -->
    <property environment="env"/>

    <!-- Setting default value for username, password and session id properties to empty string
         so unset values are treated as empty. Without this, ant expressions such as ${sf.username}
         will be treated literally.
    -->
    <condition property="sf.username" value=""> <not> <isset property="sf.username"/> </not> </condition>
    <condition property="sf.password" value=""> <not> <isset property="sf.password"/> </not> </condition>
    <condition property="sf.sessionId" value=""> <not> <isset property="sf.sessionId"/> </not> </condition>

    <taskdef resource="com/salesforce/antlib.xml" uri="antlib:com.salesforce">
        <classpath>
            <pathelement location="./ant-salesforce.jar" />
        </classpath>
    </taskdef>

    <!-- Shows check only; never actually saves to the server -->
    <target name="deployCodeCheckOnly">
      <sf:deploy
         username="${sf.username}"
         password="${sf.password}"
         serverurl="https://login.salesforce.com"
         maxPoll="40"
         deployRoot="src"
         checkOnly="true" />
    </target>

</project>
Important - Here we’ve commented the reference to the properties file and modified the pathelement line. The first dot (“.”) has been removed, changing the reference for “ant-salesforce.jar” to the same directory this job will run in.
We’ve also removed all targets, replacing them with only one. This job, “deployCodeCheckOnly”, is a modified version of the one provided using hard-coded serverurl, maxPoll, deployRoot, and checkOnly attributes. The purpose of this job will be to validate our package contents against our org without doing a deployment. This should be sufficient to confirm our job step, org connectivity, package manifest, and package contents.
Our bitbucket-pipelines.yml File
When you enable the Pipelines feature in your repository, it will create a default yaml file for you in the root of your project. You can edit the file right away or pull it down to your local machine and edit it as follows:
pipelines:
  default:
    - step:
        script:
          - ant deployCodeCheckOnly -Dsf.username=$SF_USERNAME -Dsf.password=$SF_PASSWORD
Note that I’ve removed the standard comments for brevity, and we are not specifying a custom Docker image here. Omitting an image line here will cause Pipelines to use the standard image[^6], which is already sufficient for our very simple job.
What we’re describing here is one Step, containing one Script line. Since it’s under “default”, it runs on any branch commit. The script line provided runs Ant, telling it to execute a target in our build.xml named “deployCodeCheckOnly”, and passes our Environment Variables in as values for the “sf.username” and “sf.password” variables used in that target.
Our Manifest and Project
package.xml
<?xml version="1.0" encoding="UTF-8"?>
<Package xmlns="http://soap.sforce.com/2006/04/metadata">
    <types>
        <members>SampleApexPage</members>
        <name>ApexPage</name>
    </types>
    <version>38.0</version>
</Package>
SampleApexPage.page
<apex:page>
<h1>Congratulations</h1>
This is your new Page.
</apex:page>
SampleApexPage.page-meta.xml
<?xml version="1.0" encoding="UTF-8"?>
<ApexPage xmlns="http://soap.sforce.com/2006/04/metadata">
    <description>This is a sample Visualforce page.</description>
    <label>SampleApexPage</label>
</ApexPage>
And Finally, Our Project Structure…
- bitbucket-pipelines.yml
- ant-salesforce.jar
- build.xml
- src (dir)
    |- package.xml
    \- pages (dir)
           |- SamplePage.page
           \- SamplePage.page-meta.xml
You’ll see that we’ve put bitbucket-pipelines.yml, ant-salesforce.jar, and build.xml in our project root. In the future you probably won’t put your ant jar in your project like this, but this is our simple project. The rest of your package is structured like any other, within a directory named “src”. This name is important, as it’s what we supplied in our build.xml deployRoot.
Checklist and the Moment of Truth!
-
You’ve looked over all the bits we talked about and everything makes sense, right?
-
You’ve double-checked your environment variables and confirmed that you’re about to run this against a safe Org, right?
-
You’ve looked over your git staging, and you’re sure you’re about to commit and push the parts you just reviewed, right?
-
You know you shouldn’t trust someone else not to typo or paste in the wrong command, right? ;)
==If not, stop and ask questions! ==
Otherwise, light that candle. Push your project and switch over to your Bitbucket UI. Click on Pipelines, and you should see that your new job is running!
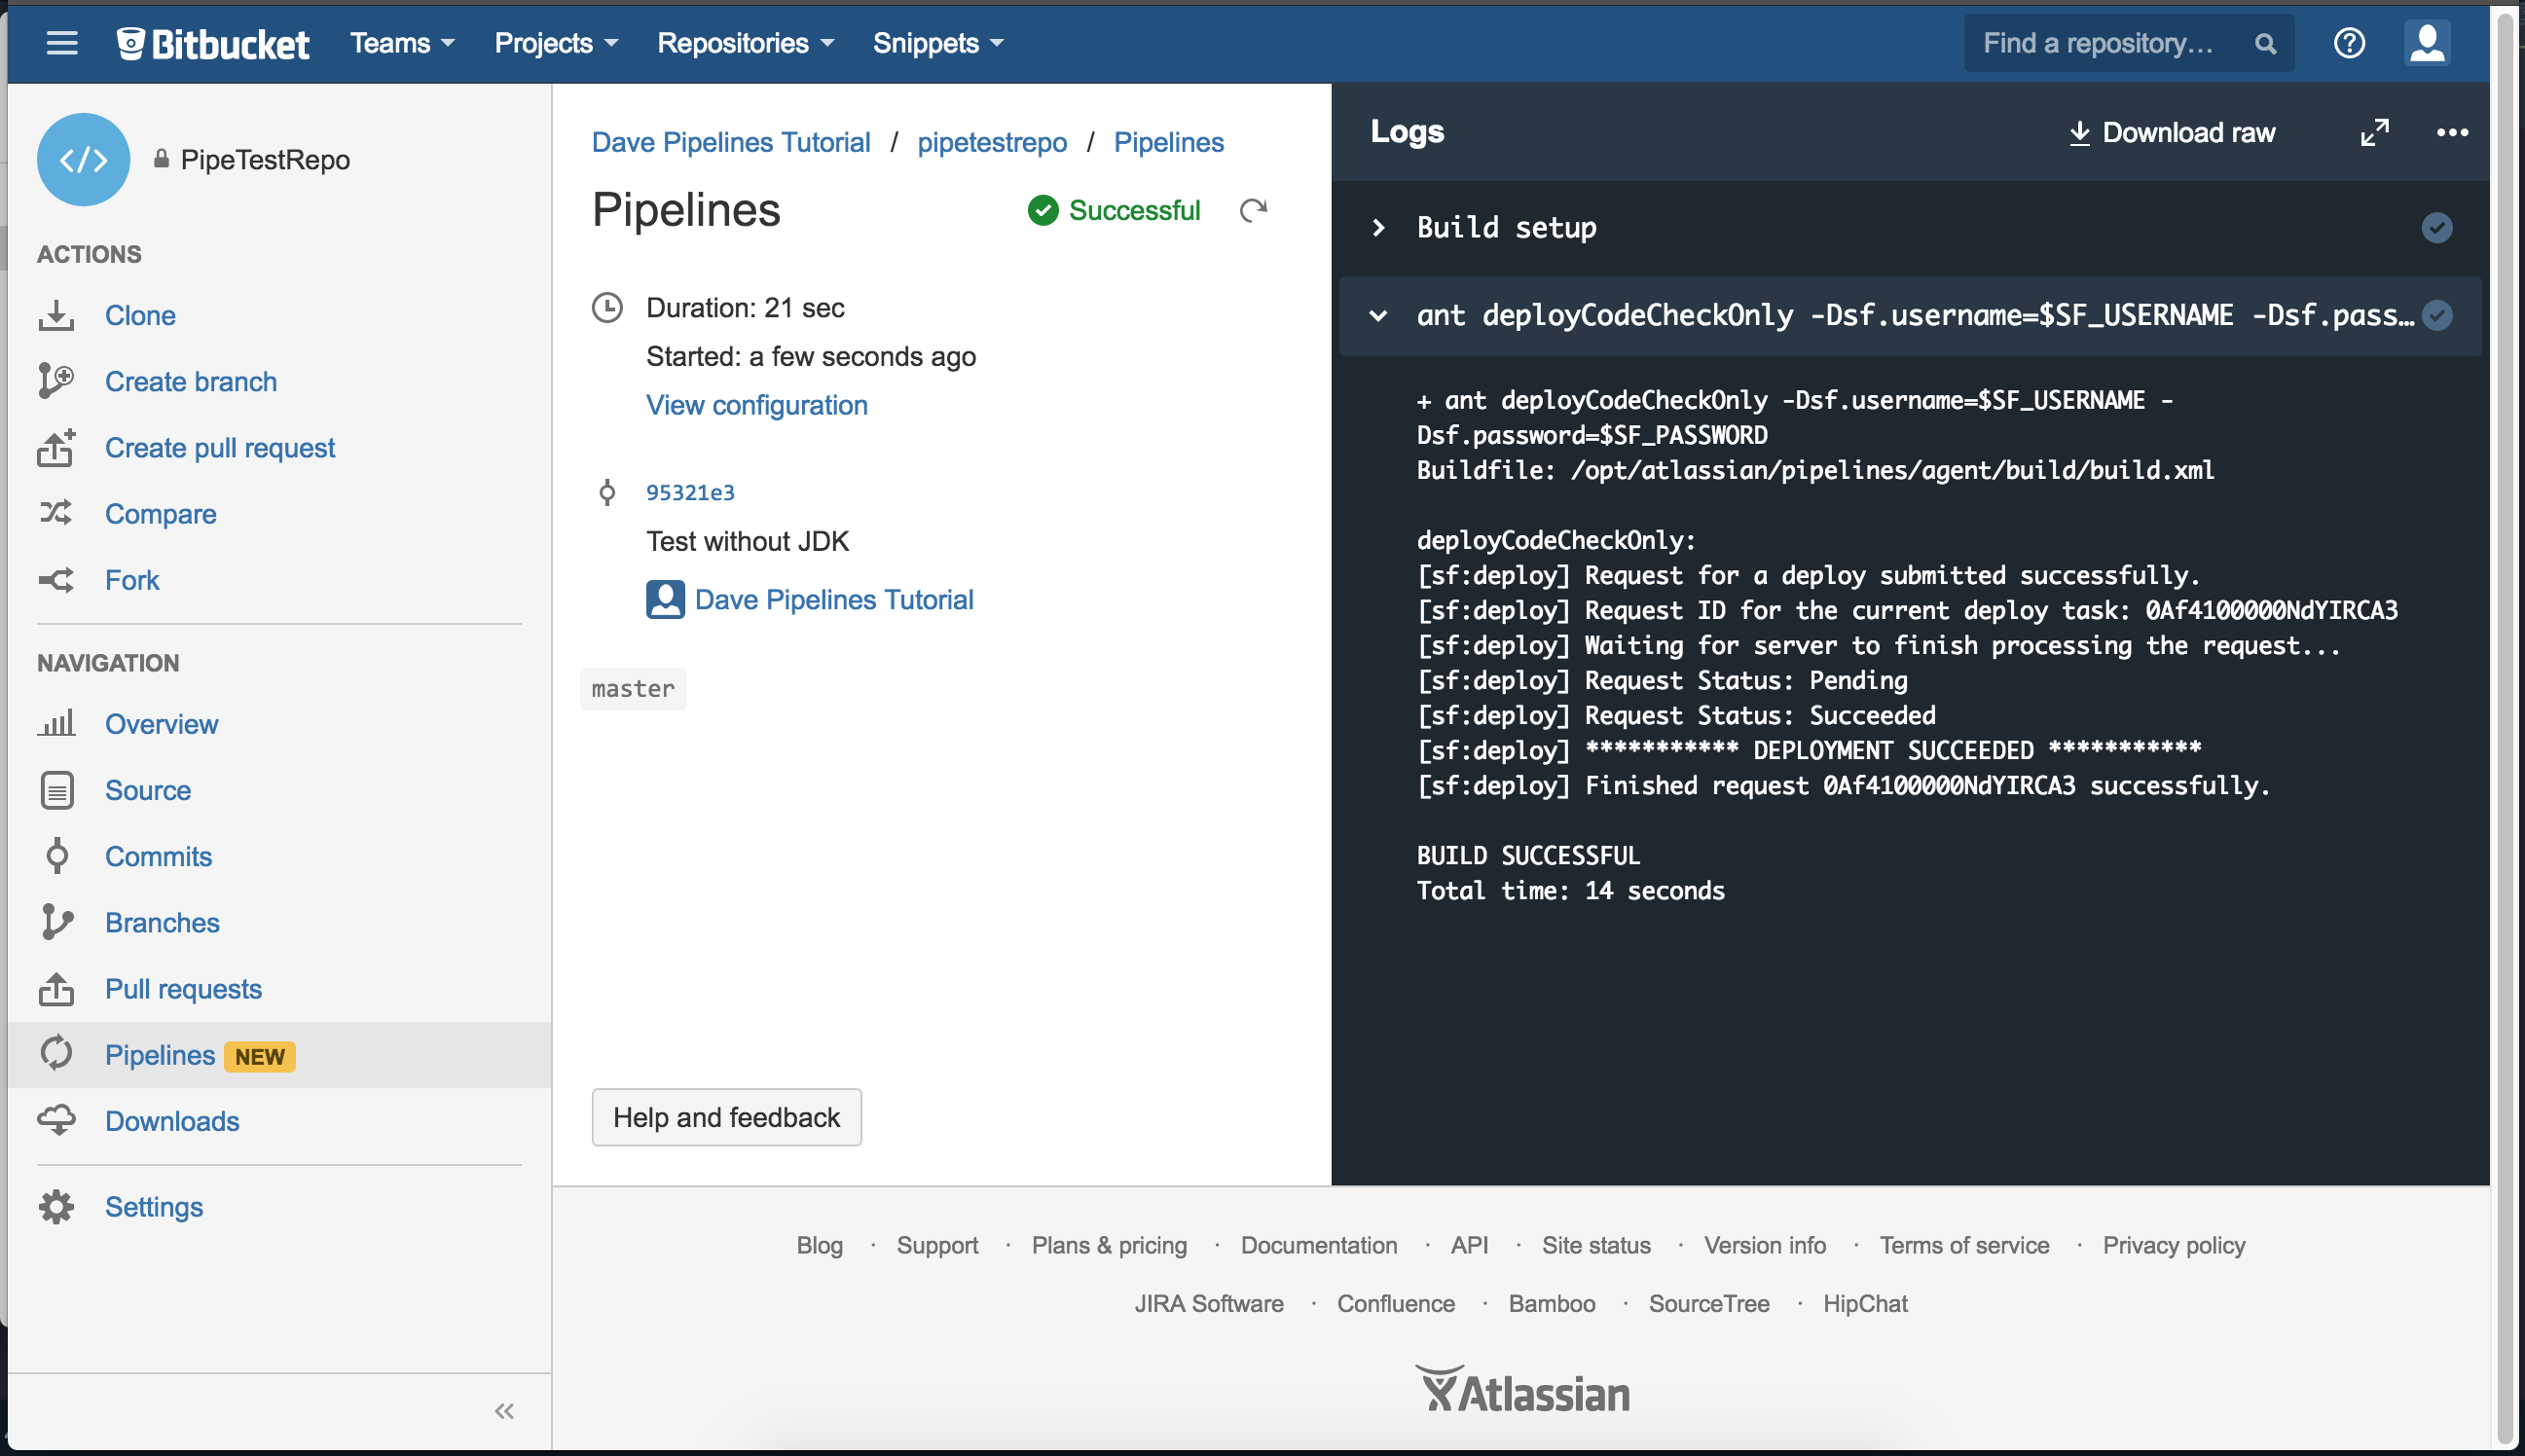
Any errors that happen while your job is trying to validate your package should appear in the second step. Troubleshooting these should be easy. Especially if you’re comfortable with the Force.com Migration Tool.
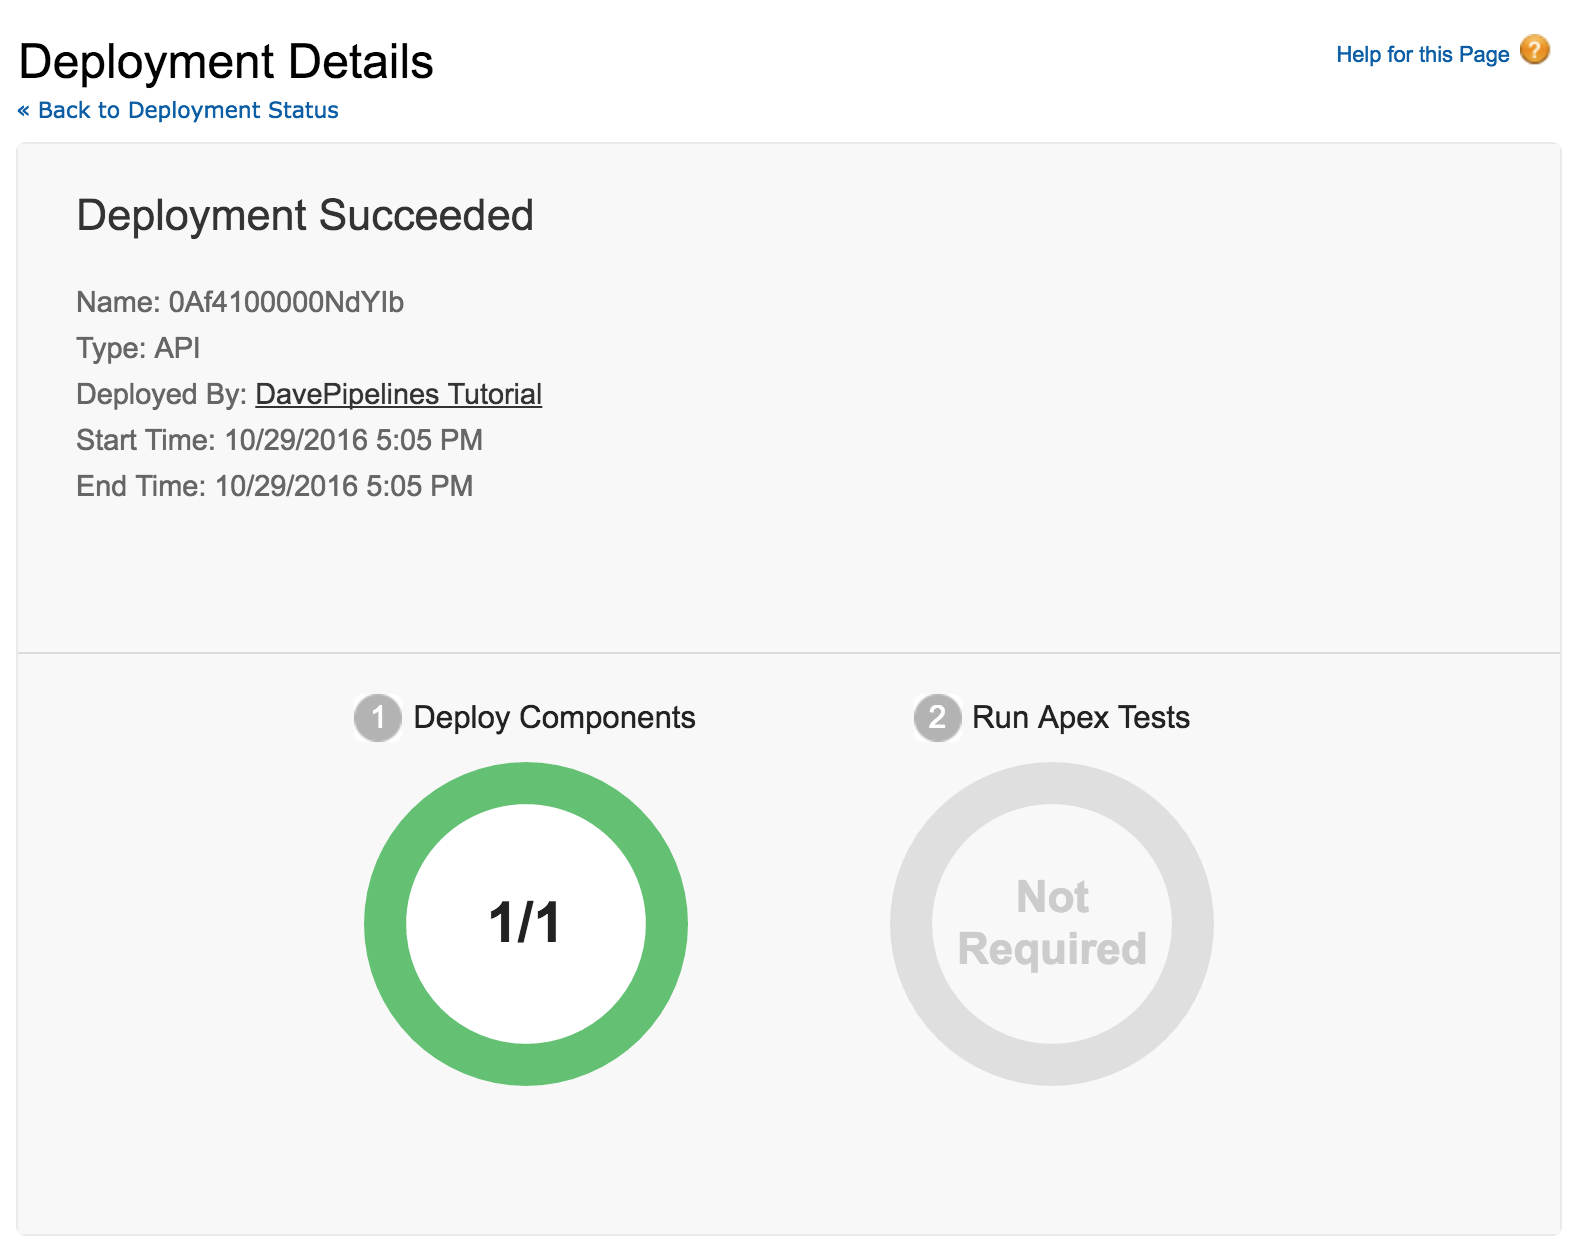
If you have your test Org open you can also watch the Deployment Status page. When the Ant job runs you should see a validation process in your Org.
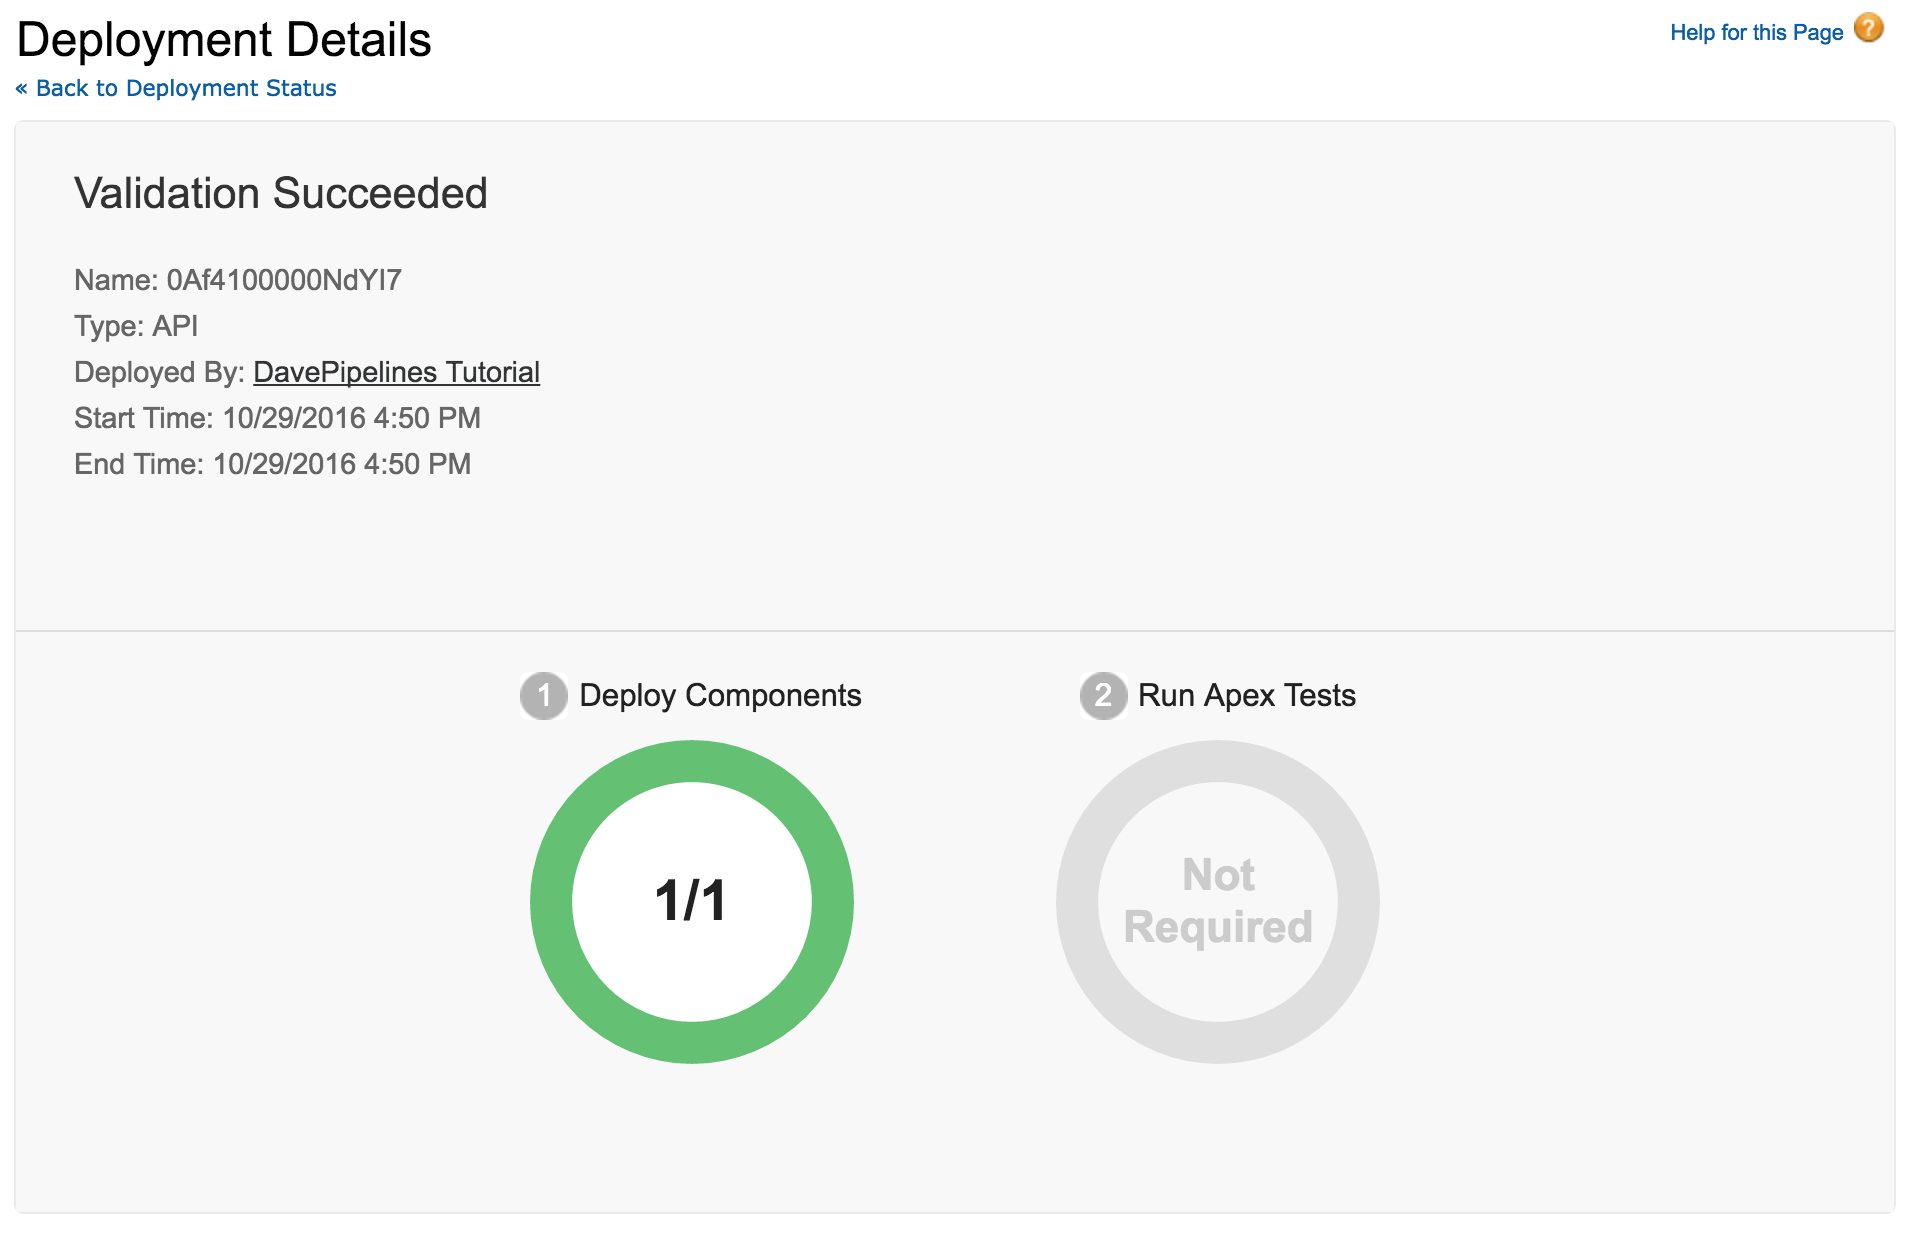
If you see something like this, that’s it! At this point you could switch the checkOnly boolean in your build.xml and commit again. That would cause your project to deploy. For real this time. ==Note that you would never do this in a production build.xml, as your target name wouldn’t match its behavior. Tsk, tsk.==

Moving Ahead…
At this point you have a very simple, boilerplate setup for project builds using Bitbucket Pipelines. You can use it to experiment with other build.xml targets, predeployment work (namespace switching, javascript processing, etc), and start building out Pipelines configurations for your real projects.
I hope this helped, and I’ll leave some valuable resources in the links below. I also intend to do a follow-up with a few examples of slightly more complicated solutions. We’ll be using our own Docker images, npm, Gulp, and all the of the pieces you’ve seen here.
Until then, if you found this helpful, please share! I’m also available via Twitter if you spot any silly mistakes or simpler routes I failed to consider.
- Dave
References
1: Atlassian Bitbucket
2: Salesforce - Force.com Migration Tool
3: Salesforce - Constructing a Project Manifest
4: Salesforce - Developer Org
5: Piplines YML Configuration Options
6: Pipelines Docker Images (Default Image, etc)